Overproofed vs Underproofed Dough: Visual Guide & Fixes
⚡ What You’ll Learn in 60 Seconds
- Poke test: Most useful during final proof, and only when combined with other cues.
- Underproofed crumb: May be uniformly tight or show tunnels beside dense, gummy areas.
- Overproofed dough: Often feels weak, spreads, and produces limited oven spring; the crumb pattern varies.
- Best diagnostic: Combine rise, dough temperature, feel, recipe target, and the baked crumb.
- Key insight: Adjust in small steps. There is no universal extra time or rescue method.
↓ Full 13-min guide with visual signs, the poke test, crumb diagnosis, recovery options, and prevention checklist

Fermentation is one of the first things to check when a sourdough loaf is dense or flat, but no single clue proves the diagnosis. Rise, dough strength, temperature, shaping, and the final crumb need to tell the same story.
Underproofing and overproofing are opposite conditions, yet both can produce a disappointing loaf. Underproofed dough has not fermented enough for the intended stage. Overproofed dough has fermented beyond the useful window for that formula and may no longer retain gas well.
The difficult part is that the symptoms overlap with other problems. A tight crumb can come from insufficient fermentation, low hydration, weak starter, poor gluten development, tight shaping, or an incomplete bake. A flat loaf can come from overproofing, weak flour, excessive hydration, or poor shaping. This guide focuses on the combinations of cues that make a fermentation diagnosis more credible.
Read the trend, not one snapshot. Dough temperature, rise, strength, and time together are more useful than any isolated poke or crumb photo.
What Over- and Underproofing Actually Mean
Two opposite mistakes, two different mechanisms
Both happen during fermentation, but they describe opposite states.
If you want the terminology first, start with what proofing means and how it differs from rising. This guide focuses on diagnosing what happened when fermentation falls short or goes too far.
Underproofed = not enough fermentation
The dough has not fermented enough for the intended stage. It may not contain or retain enough gas, and the gluten may still need development. The loaf can come out tight, heavy, uneven, or gummy.
Overproofed = too much fermentation
The dough fermented past the useful window for its formula. Gas may escape as the gluten network stretches and weakens, while acidity and enzyme activity can further reduce dough strength. The dough may spread or deflate and produce limited oven spring.
The practical distinction is the direction of change. Underproofed dough usually still has strength and needs more fermentation. Overproofed dough often feels increasingly fragile and cannot retain the gas it has already produced. Neither state can be diagnosed from crumb size alone.
Underproofing means fermentation has not progressed far enough for the intended stage. Overproofing means it has progressed too far for the dough’s remaining strength. Diagnose the whole process before changing the next bake.
The Poke Test (Step-by-Step)
A useful final-proof check, with important limits
The poke test is a quick way to assess many shaped, room-temperature doughs near the end of final proof. It is less reliable during bulk fermentation and can behave differently with very wet, enriched, whole-grain, or refrigerator-cold dough. Use it with the recipe’s rise target and visual cues.
How to do it:
- Lightly flour your index finger
- Press gently into the side or top of the dough, about 1/2 inch (1.25 cm) deep
- Pull your finger out and watch the indent
What to look for:
| Result | What It Means | What to Do |
|---|---|---|
| Springs back quickly and mostly fills | May need more final-proof time | Recheck other cues and the recipe |
| Returns slowly and leaves a shallow indent | Often ready for many lean doughs | Bake if the other cues agree |
| Indent stays and dough feels weak | May be overproofed | Handle minimally and assess rescue options |
| Surface tears or collapses | Dough may be fragile or overproofed | Stop testing and choose the least disruptive bake |
Why it works:
The response reflects a combination of elasticity, gas pressure, hydration, and dough strength. Early in final proof, elastic dough often pushes the indent back quickly. As proofing progresses, the return tends to slow. A weak dough may not recover, but the same response can be influenced by formula and temperature.
Where to poke:
For final proof in a banneton, gently test an exposed area without degassing the center. For dough resting on a counter, poke the top or side lightly. Avoid repeated deep pokes, which can damage a delicate surface.
Calibrate the poke test with one familiar formula. Record dough temperature, proof time, the response to a gentle poke, and the baked result. Comparisons across repeated bakes are more useful than memorizing an exact number of seconds.
Visual Signs of Underproofed Dough
What to spot before baking
Underproofed dough often shows several of the following cues, although none is definitive alone.
Before shaping (during bulk fermentation):
- Surface has less visible aeration than the formula usually produces at its endpoint
- Volume has not reached the target given by your formula
- Dough still feels relatively dense rather than lighter and aerated
During final proof:
- The shaped dough remains tighter and smaller than expected for that familiar formula
- Poke test shows fast spring-back
- The dough feels relatively firm rather than aerated
Just before baking:
- The shaped loaf looks tight and small relative to expected size
- A score may close quickly, although scoring behavior also depends on temperature, hydration, and surface tension
On the loaf after baking:
- Loaf looks tall but feels heavy when you pick it up
- Crust color varies with formula and bake and is not a dependable proofing test
- Oven spring may be strong but uneven; the crumb and process reveal whether it was healthy
A dramatic ear is not proof of correct or incorrect fermentation. If it appears with dense, gummy areas or tunneling, compare the result with dough rise, strength, shaping, and bake completion before blaming proofing alone.
Visual Signs of Overproofed Dough
The opposite warning signs
Overproofed dough often looks and feels weaker than underproofed dough, but the cues can overlap with flour or gluten-development problems.
During bulk fermentation:
- Dough has risen well beyond the target for that formula
- The surface may flatten, wrinkle, form craters, or begin to fall
- The dough feels much slacker or more fragile than it did earlier
During final proof:
- Dough has spread out and lost shape definition
- Surface may feel fragile, sticky, or slack
- A gentle poke may leave a lasting indent when the other cues also point to overproofing
Just before baking:
- Shaped loaf has spread sideways instead of staying tall
- Skin feels thin, fragile, or sticky
- Scoring may release tension and make the loaf spread or deflate
On the loaf after baking:
- Flat pancake shape, very limited oven spring
- Crumb may be compressed, weak, or partially collapsed, but the pattern varies
- Flavor may be more acidic, although sourness alone is not diagnostic
Crumb Diagnosis: Reading the Final Loaf
How the inside reveals which mistake happened
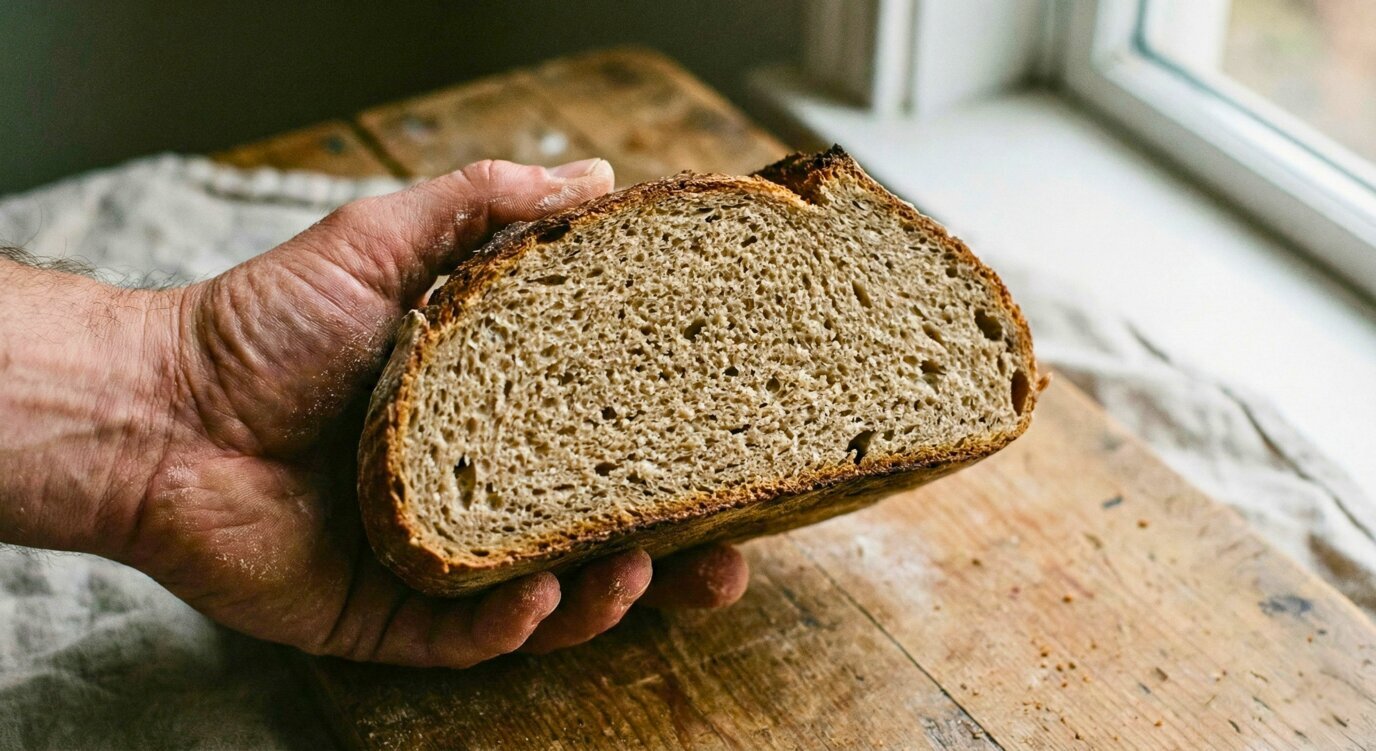
If you did not catch the problem before baking, the crumb adds useful evidence. It does not give every answer by itself, because similar patterns can come from shaping, gluten development, hydration, and baking.
Underproofed crumb:
- A few large irregular holes (“craters”) surrounded by tight, dense dough
- Gummy or wet patches, especially toward the bottom
- The crumb looks uneven: not in a good artisan way, but in a chaotic way
- Bottom of the loaf may look raw, sticky, or visibly different from the top
- Bread feels denser and heavier than expected
This pattern is often called “fool’s crumb.” The combination of tunnels and dense, gummy areas can support an underproofing diagnosis, especially when the dough also showed limited rise. Poor shaping or weak gluten can create related patterns, so check the process notes too.
Overproofed crumb:
- Fine or compressed crumb, sometimes with collapsed areas
- Weak structure or a gummy line can appear in some loaves
- Loaf may be flat or spread out with little oven spring
- Texture can feel damp or chewy
- Acidity may be stronger, but aroma alone is not a reliable proofing test
There is no single overproofed crumb pattern. A fine, compressed crumb combined with a flat loaf and slack dough is suggestive, but the diagnosis becomes stronger only when the fermentation history also shows that the dough exceeded its useful window.
A crumb consistent with the intended bread:
- Cell size and aeration fit the style of bread; a sandwich loaf and an open-crumb boule should not look the same
- No isolated tunnels surrounded by unexpectedly dense dough, unless shaping or inclusions explain them
- Crumb is fully set rather than raw or gummy from an incomplete bake
- Loaf shape, oven spring, and crumb agree with the formula and the fermentation notes
Photograph the center slice and keep it with dough temperature, bulk rise, proof time, and flour notes. A series made with the same formula is far more diagnostic than comparing one loaf with unrelated photos online.
Stop Guessing About Proof
Track the same formula across repeated bakes with timing notes and a center-slice photo. Comparisons are more useful when the flour, hydration, and process stay consistent.
What Flourwise gives you for proofing:
- Built-in journal with photos, ratings, and process notes
- Step-by-step baking mode with active timers for folds and rests
- Baker’s-percentage calculator for keeping formula and hydration changes explicit
A repeatable record makes it easier to separate fermentation changes from formula and handling changes.
How to Fix Underproofed Dough
Usually recoverable before baking
Underproofing is usually the easier problem to correct before baking. Continue fermentation, then reassess rather than adding a fixed block of time.
If you catch it during bulk fermentation:
- Continue bulk and reassess at short intervals
- Move the dough toward the temperature intended by the formula if it is running cold; roughly 75-78°F (24-26°C) is common for many wheat doughs, not a universal target
- Watch for the recipe’s target rise plus aeration, elasticity, and surface bubbles
- Do not use the poke test as the primary bulk-fermentation measurement
If you catch it during final proof:
- Continue proofing and reassess periodically
- Or move to a slightly warmer spot if proofing is dragging
- Watch for the proper poke test response (slow spring back)
- The dough should look slightly puffy and feel airy when handled
If it’s already shaped and you’re running out of patience:
- Use a cold proof only if the formula is designed for it
- Remember that refrigeration slows fermentation and does not instantly finish an underproofed loaf
- Follow the recipe on whether to bake from cold or allow additional room-temperature proofing
If you’ve already baked it:
If the loaf reached a complete bake but the texture is dense, let it cool fully before deciding how to use it. Toasting or making croutons may improve texture, but it does not correct an incompletely baked center. Note what happened in your bake journal so the next attempt is easier to diagnose.
If the dough still feels strong but clearly lacks rise, give it more time and check again. If it is already fragile or beyond the formula’s target, more time can make the result worse.
How to Fix Overproofed Dough
Mostly damage control
Overproofed dough is much harder to recover. The fixes range from “rescue what you can” to “repurpose entirely.”
Commercial-yeast pan dough that has over-risen:
- Gently deflate and reshape if the recipe and dough strength allow it
- Let it rise again while watching closely, then bake according to the recipe
- This established rescue works better for resilient commercial-yeast dough than for fragile sourdough
Slightly overproofed sourdough that still holds some shape:
- Handle it as little as possible and bake promptly
- Avoid aggressive reshaping that may expel gas the weakened dough cannot replace
- Expect less height and oven spring than usual
Severely overproofed (dough won’t hold any shape, tears when handled):
- Move it to an oiled pan and bake it as focaccia according to a suitable recipe
- Treat flatbread or other repurposing ideas as experiments, not guaranteed rescues
Why most overproofed dough can’t be rescued:
Once dough has lost substantial strength, folding cannot fully restore its earlier gas-holding capacity. The practical goal shifts from recovering an open free-standing loaf to choosing a shape and bake that need less structural strength.
Preventing Both Problems
A simple checklist for consistent proof
Once you’ve experienced both extremes, prevention becomes straightforward. The same set of practices catches both errors.
1. Use a clear, straight-sided container
A clear container with a marked starting level makes rise easier to compare. A round bowl is harder to read precisely, but surface bubbles, aeration, and dough strength still matter.
2. Measure dough temperature, not room temperature
Use a clean digital probe thermometer after mixing. Many wheat dough formulas target roughly 75-78°F (24-26°C), but follow the target in your recipe. A colder dough generally ferments more slowly than the same formula at a warmer temperature.
3. Set a target volume increase, not a target time
Use the rise target supplied by a tested formula as a starting point. Inoculation, dough temperature, flour, hydration, acidity, and the planned final proof all affect the appropriate endpoint. Do not infer one universal percentage from protein content alone.
4. Use the poke test near the end of final proof
Use a gentle poke as one final-proof cue. During bulk, rely more on rise, aeration, strength, and the formula. Avoid repeatedly poking fragile dough.
5. Plan cold retard deliberately
A planned cold proof can make scheduling easier, but the dough keeps cooling and fermenting at a rate that depends on its starting temperature and refrigerator. Follow a tested formula and learn the actual temperature of your fridge.
6. Use starter or levain at the intended maturity
Weak starter can make fermentation much slower than expected. See the feeding guide for the full process. Use the starter when it reaches the activity level required by your formula rather than applying one feeding ratio and time to every starter.
7. Track your bakes
Note dough temperature, bulk time, rise, flour, and crumb result for each loaf. Repeated bakes with one formula reveal which combinations work in your kitchen.
Conclusion: Read the Dough With the Recipe
Overproofing and underproofing are opposite fermentation states that can produce overlapping symptoms. Changing the next bake based on one crumb photo can send you in the wrong direction.
The better approach is to read the whole process. Dough temperature, rise, strength, visual signs, and a final-proof poke together provide useful evidence. Recipe times remain estimates, but a tested formula gives the target those observations should be compared with.
For your next bake, mark the starting height, measure dough temperature, and photograph the center slice. Keep the formula unchanged. That record will teach you more than a generic clock or a single universal test.
Quick Reference
- Poke test: a useful cue near the end of final proof, not a standalone verdict
- Underproofed crumb: may be tight or show tunnels beside dense, gummy areas
- Overproofed dough: often weak, slack, spread out, and short on oven spring; crumb varies
- Underproofed fix: continue fermentation and reassess rather than adding a universal time
- Commercial-yeast dough may tolerate deflating and reshaping; delicate sourdough may not
- Very weak sourdough is often better suited to an oiled pan than a free-standing loaf
- Prevention: tested formula, marked container, dough thermometer, visual cues, and bake notes
Frequently Asked Questions
How can I tell if my dough is overproofed or underproofed?
Use several cues together. During final proof, a gentle poke that springs back quickly can mean the dough needs more time, while a slow partial return often means it is ready. An indent that stays can indicate overproofing, but high-hydration, enriched, whole-grain, and cold dough can respond differently. Also check the recipe’s target rise, dough temperature, surface, strength, and fermentation history.
What does overproofed sourdough look like inside?
Overproofed sourdough often spreads, has weak oven spring, and may show a fine, compressed, gummy, or partially collapsed crumb. The exact crumb varies with flour, hydration, shaping, and how far fermentation progressed, so tiny uniform holes are not a universal sign. Diagnose it alongside slack dough, loss of shape, excessive rise, and the fermentation timeline.
What does underproofed sourdough look like inside?
Underproofed sourdough may have a tight, heavy crumb or a few tunnels and large holes surrounded by dense, gummy areas, a pattern often called fool’s crumb. It may also show strong, uneven oven spring. These signs can overlap with weak gluten development, shaping problems, or baking issues, so use the dough’s rise and fermentation history as part of the diagnosis.
Can you fix overproofed dough?
It depends on the dough and when you catch it. Many commercial-yeast pan doughs can be gently deflated, reshaped, proofed again, and baked. Delicate sourdough may lose too much strength for that treatment; if it is only slightly overproofed, handle it minimally and bake promptly. Very slack dough is often better baked in an oiled pan as focaccia. Follow the formula rather than applying one rescue method to every dough.
Can you fix underproofed dough?
If the dough is still unbaked, give it more time at an appropriate temperature and reassess in short intervals. The amount of extra time cannot be fixed in advance because dough temperature, yeast or starter strength, and formula all matter. Refrigeration slows fermentation; it is useful when the recipe calls for a cold proof, but it is not a quick substitute for finishing an obviously incomplete room-temperature proof.