How to Feed Sourdough Starter: Complete Step-by-Step Guide (2026)
⚡ What You’ll Learn in 60 Seconds
- Basic process: Discard most starter → add equal flour + water → mix → wait 4-8 hrs for peak
- Standard ratio: 1:1:1 (50g starter + 50g flour + 50g water) works for most schedules
- Frequency: Daily if room temp, weekly if refrigerated – adjust ratio for longer intervals
- Ready signs: Doubled in size, bubbly throughout, passes float test, pleasant sour smell
- Key insight: Exact amounts matter less than consistency – starter is more resilient than you think
↓ Full 13-min guide with step-by-step process, feeding schedules, readiness tests, and troubleshooting
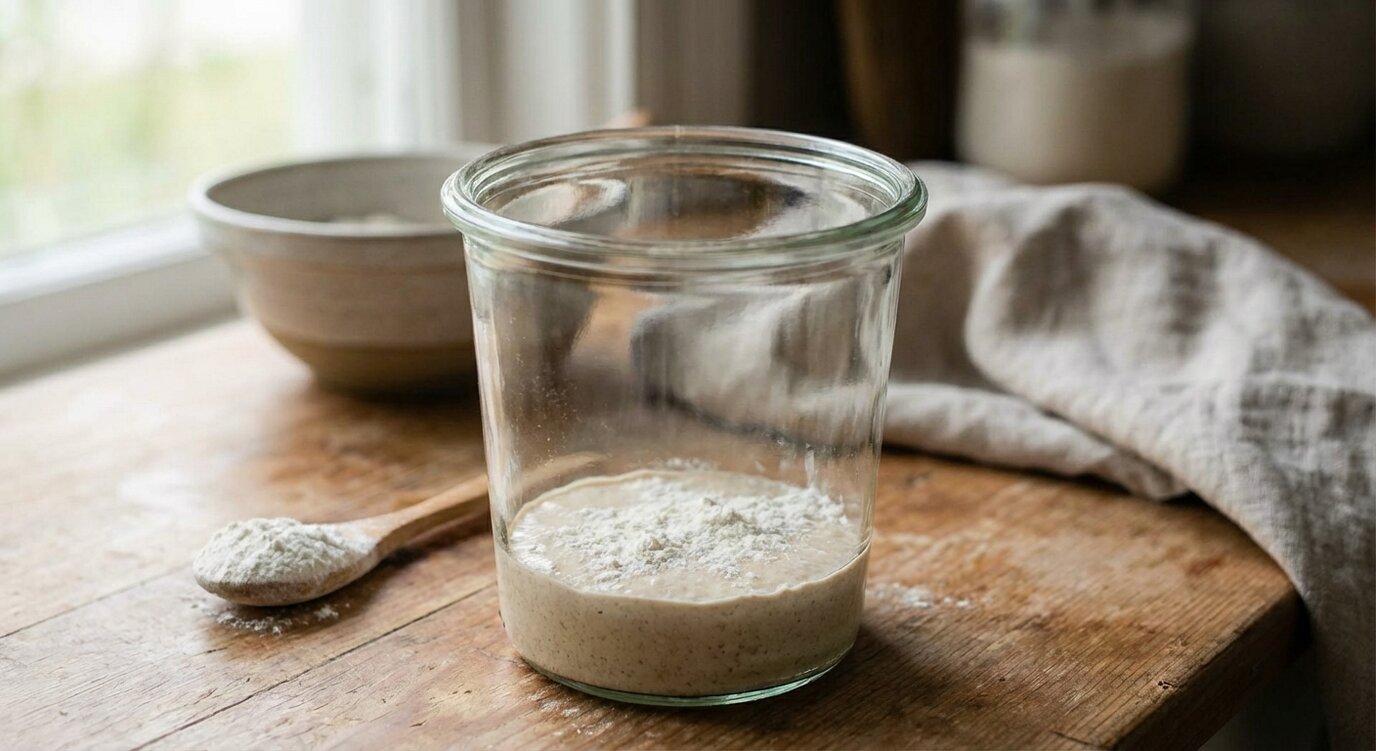
Feeding is simpler than it seems. Remove most of the old starter (discard), add fresh flour and water in equal amounts, stir until combined, wait for it to bubble and rise. That’s it. The complicated-sounding ratios, temperatures, and timing are just variables you adjust for your schedule – the core process never changes.
The first time I fed my starter, I overthought everything. How much to discard? What if I use the wrong ratio? Should the water be exactly room temperature? I spent 20 minutes measuring and second-guessing what should have taken 3 minutes.
After maintaining starters for over 3 years and feeding them hundreds of times, I’ve learned that feeding is straightforward. You discard most of the old starter, add fresh flour and water, mix, and wait. The exact ratio matters less than consistency. The water temperature has a wider tolerance than you think. Your starter is resilient.
This guide covers the complete feeding process – basic technique, different feeding ratios, when to feed, storage schedules, and how to recognize when your starter is ready to use. You’ll learn the method I use and understand why each step matters.
Feeding sourdough starter is maintenance, not magic. The process stays the same whether it’s day 5 or year 5. Once you understand the basic cycle – feed, wait for peak, use or refrigerate – everything else is just adjusting variables for your schedule.
The Basic Feeding Process (Step-by-Step)
The standard method that works every time
This is the basic 1:1:1 feeding ratio (equal parts starter, flour, and water by weight). Once you master this, all other ratios follow the same pattern with different proportions.
Standard Feeding Procedure
-
Discard excess starter
Remove all but 50g of starter from your jar. Save the discard for pancakes, crackers, or compost. If your jar is crusty, transfer the 50g to a clean jar instead.
-
Add flour (50g)
Use the same flour type you built your starter with – typically all-purpose, bread flour, or a mix. Add directly to the starter in the jar.
-
Add water (50g)
Use room temperature water (65-75°F is fine). Filtered or spring water works best if your tap water is heavily chlorinated. Pour directly into the jar.
-
Mix thoroughly
Stir vigorously with a spoon or fork until no dry flour remains and the mixture is smooth and uniform. Scrape down the sides of the jar.
-
Mark the starting level
Use a rubber band, tape, or dry-erase marker to mark the height of the mixture. This lets you track the rise visually.
-
Cover loosely
Place the lid on loosely (not sealed tight) or cover with a cloth secured with a rubber band. Starter needs air circulation but protection from dust and insects.
-
Wait for peak activity
Leave at room temperature (68-75°F) for 4-8 hours. Starter should double in height, become full of bubbles, and develop a domed top. This is peak – when you use it for baking or refrigerate it.
My feeding routine takes 3 minutes. I keep my starter in a 16oz glass jar, weigh it, dump out excess until I have 50g left, add 50g flour and 50g water directly in the jar, stir for 30 seconds, mark with a rubber band, close loosely, and set on the counter. The whole process is mechanical now – no thinking required.
What You Need
- Digital kitchen scale (essential for accuracy – measuring by volume doesn’t work)
- Glass jar (16oz/500ml minimum, wide mouth for easy stirring)
- Spoon or fork (any material works – metal is fine)
- Flour (all-purpose, bread flour, or whole wheat)
- Water (filtered, spring, or dechlorinated tap water)
- Rubber band or marker (to track rise)
Understanding Feeding Ratios
What the numbers mean and when to use each ratio
Feeding ratio is written as starter:flour:water by weight. For example, 1:1:1 means equal parts of each. The ratio determines how much food you give the microorganisms, which affects how long the starter stays active.
| Ratio | Example | Peak Time | Best For |
|---|---|---|---|
| 1:1:1 | 50g starter + 50g flour + 50g water | 4-8 hours | Daily feeding, building starter, frequent baking |
| 1:2:2 | 50g starter + 100g flour + 100g water | 6-10 hours | Twice-daily feeding, extending peak window |
| 1:5:5 | 20g starter + 100g flour + 100g water | 8-12 hours | Once daily feeding, overnight rise |
| 1:10:10 | 10g starter + 100g flour + 100g water | 12-16 hours | Long intervals, very mature starters only |
Higher ratios (more flour and water relative to starter) extend the time to peak but also extend how long the starter stays active. Use higher ratios when you want longer intervals between feedings. Use 1:1:1 for predictable, short cycles.
Why Ratio Matters
The ratio affects fermentation speed:
- More starter (lower ratio like 1:1:1): More microorganisms eating the food = faster fermentation = shorter time to peak. Good for daily feeding and when you want reliable, quick results.
- Less starter (higher ratio like 1:5:5): Fewer microorganisms with more food = slower fermentation = longer time to peak. Good for once-daily feeding or when you need the starter ready at a specific time.
I use 1:1:1 ratio 90% of the time because it’s simple and predictable. When I bake in the morning and need starter ready by evening, I’ll use 1:5:5 in the morning and it peaks perfectly 10-12 hours later. For weekly refrigerator maintenance, I use 1:2:2 – feeds the starter well before it goes back to cold storage.
Hydration Level
Most starters are maintained at 100% hydration (equal weight flour and water). This creates a thick but pourable consistency. You can maintain starters at different hydrations (50% for stiff, 150% for liquid), but 100% is standard and easiest for beginners.
When to Feed Your Starter
Reading your starter’s hunger signals
Knowing when to feed matters as much as how to feed. Your starter gives clear visual and olfactory signals about its state.
Signs It’s Time to Feed
Peak has passed:
- Starter has risen to maximum height and started falling
- Surface has collapsed inward or looks deflated
- Still has bubbles but less active than at peak
- Smell becomes more intensely sour or boozy
Clear liquid on top (hooch):
- Gray, brown, or clear liquid layer on surface
- This is alcohol from yeast fermentation
- Means starter is very hungry and needs feeding soon
- Stir it back in or pour it off – both work
Strong acetone smell:
- Very sharp, nail-polish-remover odor
- Indicates overly hungry starter
- Still recoverable – just feed it
Feeding Before Peak
You can feed starter before it peaks, but this creates less predictable results. The microorganisms haven’t fully consumed the food yet, so you’re diluting an incomplete fermentation. This weakens the culture over repeated feedings.
Don’t feed starter every 6 hours at 1:1:1 ratio “to make it stronger.” This doesn’t give the culture time to fully ferment, which weakens it over time. Let it reach peak, then feed. Trust the fermentation cycle.
Feeding After Extended Neglect
If your starter sat refrigerated for 2-4 weeks (or longer):
- Take it out, inspect for mold (fuzzy growth = throw out)
- Pour off any hooch
- Feed with 1:1:1 ratio at room temperature
- Wait 8-12 hours, it may be sluggish
- Feed again with 1:1:1 ratio
- By second or third feeding, activity should return
Feeding Schedules by Storage Method
Matching feeding frequency to your baking habits
How often you feed depends on where you store your starter and how frequently you bake.
Room Temperature (Active Maintenance)
Schedule: Feed every 12-24 hours (once or twice daily)
Method:
- Feed when starter passes peak and starts falling
- Typically peaks 4-8 hours after feeding at 70-75°F room temperature
- If you feed in morning, it peaks by afternoon/evening – feed again or refrigerate
- If you feed twice daily: morning feed, evening feed, repeat
Best for: Frequent bakers (3+ times per week), learning starter behavior, building new starter
Pros: Starter stays very active and predictable, always ready for baking
Cons: Requires daily attention, generates more discard
Refrigerated (Low Maintenance)
Schedule: Feed once per week (some starters tolerate 2 weeks)
Method:
- Feed starter at 1:2:2 or 1:5:5 ratio
- Let it ferment at room temp for 1-2 hours (gets activity started)
- Put in refrigerator (35-40°F)
- Cold temperature slows fermentation dramatically
- Once weekly, take out, discard most, feed, let sit 1-2 hours, return to fridge
To use for baking:
- Remove from fridge 12-24 hours before baking
- Feed at room temperature
- Wait for peak activity (8-12 hours)
- Feed again if needed (2nd feeding often produces more vigorous starter)
- Use at peak
Best for: Occasional bakers (once per week or less), minimal maintenance
Pros: Very low maintenance, less discard, flexible schedule
Cons: Requires planning ahead for baking, starter less active than room-temp maintained
I keep my main starter refrigerated because I bake 1-2 times per week. Every Sunday, I take it out, feed it, let it sit on the counter for 2 hours, then back in the fridge. When I want to bake Friday evening, I take it out Thursday morning, feed it, and by Thursday evening it’s at peak. I feed again Friday morning if I need more starter, and it’s ready for evening baking.
Dried (Long-Term Backup)
Schedule: No feeding required (dormant state)
Method:
- Spread thin layer of active starter on parchment paper
- Let dry completely at room temperature (24-48 hours)
- Break into flakes and store in airtight container
- Keeps for months or years
To reactivate:
- Add 1-2 tablespoons dried starter to jar
- Add 50g water, let hydrate 1 hour
- Add 50g flour, mix, wait 12-24 hours
- Feed daily for 3-5 days until consistent activity returns
Best for: Backup in case main starter dies, sharing starter with friends, long travel periods
How to Know Your Starter Is Ready
Visual and physical tests for peak activity
Ready starter has reached peak fermentation – the microorganisms are most active, gas production is maximum, and leavening power is strongest. This is when you use it for baking.
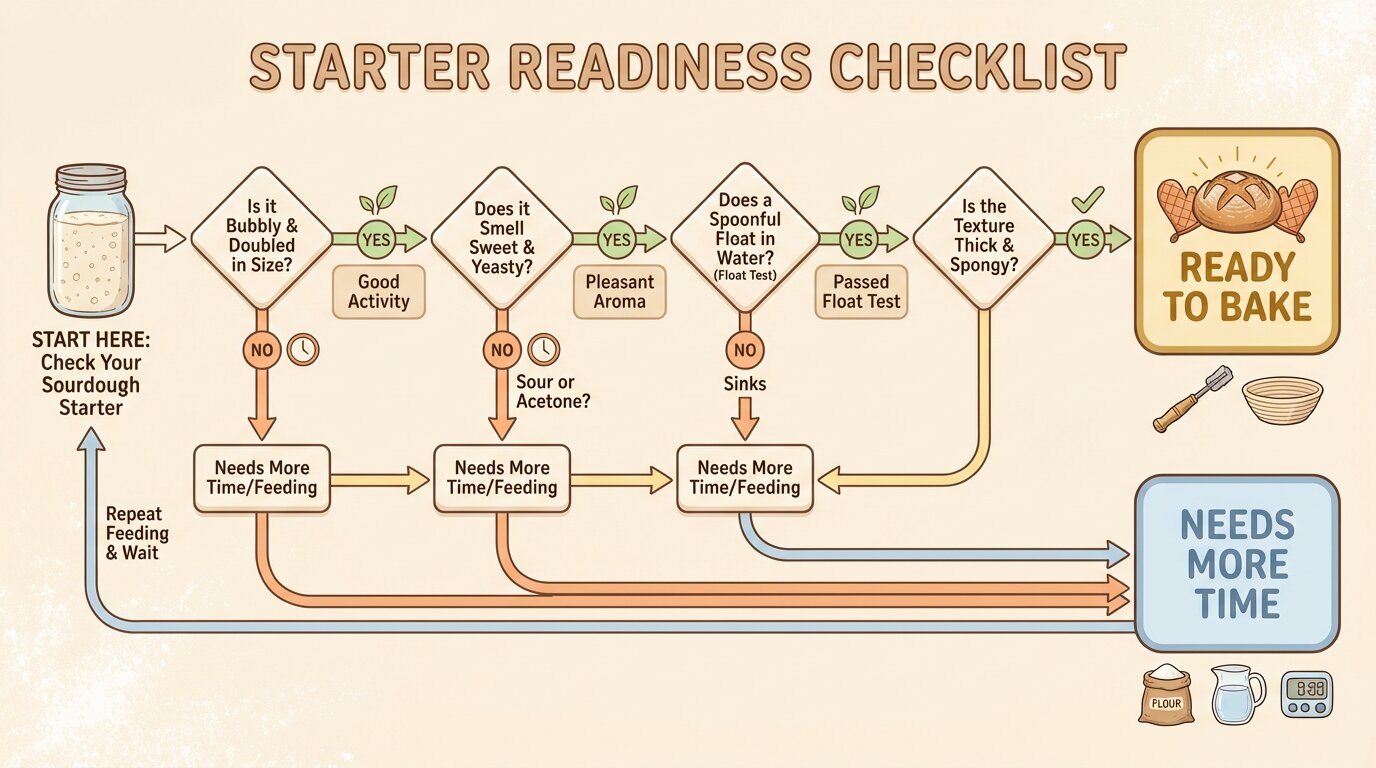
The Four Key Signs
✓ Height: Doubled or tripled in size
Measure from your rubber band mark. Should be at least 2x the starting height, sometimes 3x for very vigorous starters.
✓ Bubbles: Throughout the mixture
Look at the side of the jar – you should see bubbles of various sizes distributed evenly. Surface should be domed and bubbly.
✓ Float test: Spoonful floats in water
Drop a small spoonful into a glass of water. If it floats, it contains enough gas to leaven bread. If it sinks, needs more time or another feeding.
✓ Smell: Pleasant sour, like yogurt or beer
Should smell tangy and slightly sweet, not rotten or extremely sharp. A mild alcohol smell is fine. Very strong acetone smell means it’s past peak.
Timing Peak Activity
Peak timing varies based on several factors:
- Temperature: 70°F = 6-8 hours | 75°F = 4-6 hours | 65°F = 10-12 hours
- Feeding ratio: 1:1:1 = 4-6 hours | 1:5:5 = 10-12 hours
- Starter maturity: Young starters (under 2 weeks) slower than mature starters
- Flour type: Whole wheat/rye faster than white flour (more nutrients)
I’ve learned to recognize peak just by looking at my starter. The jar feels light when I pick it up (full of air). The surface is domed and starting to look slightly wrinkled at the edges. When I tilt the jar, the starter flows slowly like thick honey. At this point, I know it’s ready – usually 5-6 hours after feeding at my kitchen temperature of 72°F.
Using starter before peak (too early) results in slow, unpredictable fermentation. Using starter after peak (too late, when it’s falling) can work but may produce overly sour bread with weaker rise. Aim for the peak window – when it’s at maximum height and fully bubbly.
Calculating Exact Feeding Amounts
The math behind different ratios
Understanding the calculation lets you scale feeding up or down based on how much starter you need.
Basic Formula
For any ratio (starter:flour:water), the calculation is:
Total weight after feeding = starter + flour + water
Example for 1:1:1 ratio:
- 50g starter + 50g flour + 50g water = 150g total
Example for 1:5:5 ratio:
- 20g starter + 100g flour + 100g water = 220g total
Working Backwards From Total Needed
If your recipe needs 200g active starter, work backwards:
For 1:1:1 ratio (total = 3 parts):
- 200g ÷ 3 = 66.7g per part
- Use 67g starter + 67g flour + 67g water = 201g total
For 1:2:2 ratio (total = 5 parts):
- 200g ÷ 5 = 40g per part
- Use 40g starter + 80g flour + 80g water = 200g total
Common Feeding Amounts
| Ratio | Starter | Flour | Water | Total |
|---|---|---|---|---|
| 1:1:1 | 50g | 50g | 50g | 150g |
| 1:2:2 | 50g | 100g | 100g | 250g |
| 1:5:5 | 20g | 100g | 100g | 220g |
| 1:10:10 | 10g | 100g | 100g | 210g |
I keep my maintenance feeds small (50g starter + 50g flour + 50g water) to minimize discard. When I’m baking and need more starter, I’ll do a larger feed the night before: 100g starter + 100g flour + 100g water gives me 300g total, which is enough for most recipes with some left over for maintenance.
Stop Guessing Feeding Amounts
Flourwise calculates exact weights for any ratio and reminds you when it’s time to feed.
Calculator + reminders in one app:
- Select ratio (1:1:1, 1:2:2, 1:5:5, custom) → instant weight calculations
- “I have X grams” or “I need X grams” → auto-calculates everything
- Push notification reminders on your schedule (12h, daily, custom)
- Track feeding history and starter activity over time
Feed consistently. Calculate accurately. Bake better bread.
Common Feeding Mistakes
What to avoid and why
1. Measuring by Volume Instead of Weight
The mistake: Using cups or tablespoons to measure flour and water
Why it’s wrong: Volume measurements are wildly inconsistent. 1 cup of flour can weigh 120g-150g depending on how densely packed. This creates unpredictable hydration and feeding ratios.
Solution: Always use a digital kitchen scale. Weigh everything in grams. Costs $15 and eliminates the biggest source of inconsistency.
2. Using Chlorinated Tap Water
The mistake: Feeding with heavily chlorinated tap water directly from faucet
Why it’s problematic: Chlorine inhibits microbial growth – which includes the beneficial yeast and bacteria in your starter. Heavy chlorination can weaken or slow your culture.
Solution: Use filtered water, spring water, or let tap water sit uncovered for 24 hours (chlorine evaporates). If your tap water is lightly chlorinated, it’s usually fine.
3. Feeding Too Frequently
The mistake: Feeding every 4-6 hours before starter reaches peak
Why it’s wrong: Doesn’t allow complete fermentation cycle. Microorganisms don’t fully consume the food, culture doesn’t strengthen properly, and you create excessive discard.
Solution: Let starter reach peak (doubled, bubbly, passes float test) before feeding. This usually takes 8-12 hours for refrigerated starters returning to room temp, 4-8 hours for actively maintained starters.
4. Not Mixing Thoroughly
The mistake: Leaving dry flour pockets or not incorporating water completely
Why it’s wrong: Dry flour can’t be consumed by microorganisms. Uneven hydration creates inconsistent fermentation. Dry pockets can develop mold.
Solution: Stir vigorously for 30-60 seconds until mixture is completely smooth and uniform. Scrape down jar sides. No dry flour should remain.
5. Sealing Jar Tightly
The mistake: Screwing lid on tight or using airtight container
Why it’s wrong: Fermentation produces CO2 gas. Sealed container can build pressure and potentially explode (rare but possible). Starter also benefits from some air exchange.
Solution: Cover loosely – lid resting on top (not screwed), cloth secured with rubber band, or jar with airlock. Starter needs protection from dust/insects but not an airtight seal.
Troubleshooting Feeding Issues
Solutions to common problems
Problem: Starter Not Rising After Feeding
Possible causes:
- Too cold (below 65°F slows activity dramatically)
- Starter too young (needs more time to establish)
- Chlorinated water killed microorganisms
- Ratio too high (1:10:10 with immature starter can be too much food)
Solutions:
- Move to warmer spot (70-75°F ideal)
- Continue daily feedings for new starters – can take 7-10 days
- Switch to filtered or spring water
- Use lower ratio (1:1:1) to build activity
Problem: Starter Smells Like Acetone/Nail Polish
Cause: Very hungry starter, past peak, producing excess alcohol
Solution: Feed more frequently. If you’re feeding once every 24 hours and getting this smell, feed every 12 hours instead. For refrigerated starter, feed weekly instead of every 2 weeks.
Problem: Hooch Appearing Frequently
Cause: Starter consuming all food and entering starvation phase before next feeding
Solutions:
- Feed more frequently (reduce interval between feedings)
- Use higher feeding ratio (more food = lasts longer)
- Example: If you feed 1:1:1 and get hooch in 16 hours, switch to 1:2:2 or feed every 12 hours instead of every 24
Problem: Starter Takes Forever to Peak (12+ hours)
Possible causes:
- Temperature too cool
- Feeding ratio too high
- Weak or underfed starter
Solutions:
- Increase ambient temperature (place near oven, use proofing box, or warming mat)
- Lower feeding ratio (1:5:5 → 1:2:2 → 1:1:1)
- Feed daily at 1:1:1 for a week to strengthen culture
Problem: Starter Peaks in 2-3 Hours (Too Fast)
Possible causes:
- Temperature too warm (above 80°F)
- Feeding ratio too low
- Very active, healthy starter
Solutions:
- Move to cooler location
- Increase feeding ratio (1:1:1 → 1:5:5 or higher)
- If starter is just very strong, this isn’t a problem – use it when ready or increase ratio for longer window
Conclusion: Feeding Becomes Second Nature
When I started maintaining a starter, feeding felt like a delicate science experiment. Measure precisely, check temperature, watch timing obsessively. Within a few weeks, it became routine. Now I feed my starter while coffee brews – weigh jar, dump excess, add flour and water, stir, mark level, done.
The process doesn’t change. Discard, feed, wait for peak, use or refrigerate. The variables change (ratio, temperature, timing) based on your schedule, but the fundamentals stay the same.
Once you’ve fed your starter 10-15 times, you’ll develop a feel for it. You’ll recognize peak just by looking. You’ll know if your kitchen is warm or cool and adjust timing accordingly. Feeding transforms from a careful procedure into an automatic habit.
The reward is consistent access to active starter that produces better bread than commercial yeast can deliver. That’s worth 3 minutes of weekly maintenance.
Quick Reference
- Basic feeding: discard most, add equal parts flour and water (1:1:1), mix, wait 4-8 hours
- Feeding ratios: starter:flour:water by weight (1:1:1 standard, 1:5:5 for longer intervals)
- Always use digital scale, never measure by volume (cups/spoons are inaccurate)
- Ready signs: doubled in height, full of bubbles, passes float test, pleasant sour smell
- Room temp storage: feed daily (every 12-24 hours)
- Fridge storage: feed weekly, bring to room temp 12-24 hours before baking
- Peak timing: 4-8 hours at 70-75°F for 1:1:1 ratio, longer for higher ratios or cooler temps
- Hooch (liquid on top) = hungry starter, feed more frequently or increase ratio
- Cover loosely, never seal tight (gas needs to escape)
- Use filtered/spring water if tap water is heavily chlorinated
Frequently Asked Questions
How often should I feed my sourdough starter?
Feeding frequency depends on storage: Room temperature starter needs feeding every 12-24 hours (daily). Refrigerated starter needs feeding once per week. If you bake frequently (3+ times weekly), keep at room temperature and feed twice daily. For occasional baking, refrigerate and feed weekly. Before baking, feed 2-3 times at room temperature to restore full activity.
What is the best feeding ratio for sourdough starter?
The standard feeding ratio is 1:1:1 (starter:flour:water by weight), meaning equal parts of each. Example: 50g starter + 50g flour + 50g water. For longer intervals between feedings, use 1:5:5 or 1:10:10 ratios (more food = lasts longer). For frequent baking, 1:2:2 provides good activity. All ratios work – higher ratios just provide more food, extending time between feedings.
How do I know when my starter is ready to use?
Ready starter shows four key signs: 1) Doubled or tripled in height from feeding, 2) Full of bubbles throughout the mixture, 3) Passes float test (small spoonful floats in water), 4) Pleasant sour smell like yogurt or beer. This typically occurs 4-8 hours after feeding at room temperature (70-75°F). Use at peak – before it starts falling. Timing varies by temperature and feeding ratio.
Can I use tap water to feed my sourdough starter?
Yes, but it depends on your water quality. If your tap water is heavily chlorinated, it can inhibit the microorganisms in your starter. Use filtered or spring water, or let tap water sit uncovered for 24 hours to allow chlorine to evaporate. If your tap water is lightly chlorinated or uses chloramine (doesn’t evaporate), filtered water is safer. Many bakers use tap water successfully – test and observe your starter’s response.
What should I do with sourdough discard?
Discard (the portion you remove before feeding) can be used in recipes: pancakes, waffles, crackers, pizza dough, muffins, quick breads, or even added to regular bread dough for flavor. You can collect discard in a jar in the fridge and use throughout the week. Alternatively, compost it. Don’t pour large amounts down the drain – the sticky mixture can cause plumbing issues. If you’re not using discard, keep your maintenance feeds small (50g starter) to minimize waste.